A bicycle tune-up is an overhaul of your bike. It’s the process of making sure everything on your bicycle is working properly. A tune-up is necessary if something on your bike has malfunctioned or worn out or needs to be altered for you to be riding at maximum efficiency and comfort.
Professional mechanics often perform tune-ups, but it depends on how much work is needed and what kind of rider you are. If you’re mechanically inclined, then most likely, you can do some of these things yourself. Below are some steps to perform a basic tune-up for your road bike, including photos (click on them to enlarge). Keep in mind this is only a basic overview; make sure to check with your local bike store to find out what services they offer and how much it will cost.
On the other hand, if you’re not mechanically inclined and would like someone else to do your tune-up (or at least most of it), then you can take your bike into a local bike shop and expect it’ll cost between $50-$150… depends on how extensive the service is. Your best bet is calling around before taking your bike in so you know what to expect when you get there. Or, if you have some money to spare, I recommend checking out [ this website ] for prices on bicycle tune-ups. It’s a great resource.
Now that we’ve got some background info on tune-ups, let’s get started:
First off, assemble all the tools you need, either from your local bike shop or from a tool kit you may have at home.
Tools needed for a basic tune-up: Wrench set Adjustable wrench Allen wrench set Tire levers Screwdriver Multi-tool Bicycle work stand Cable cutter/crimper Pliers.
Prepare all of your tools and place them somewhere convenient to be accessed while working on the bike. Most importantly, make sure to get the right size wrenches if you plan on doing any work yourself! Be sure to check out [ this website ] for more info about proper bicycle tool kits.
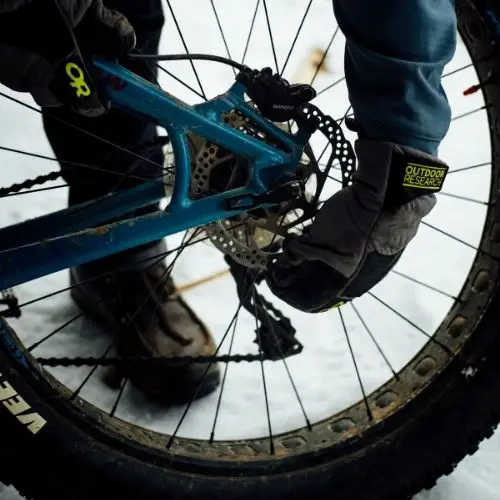
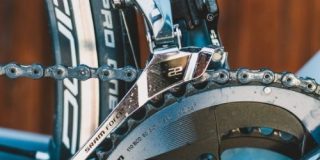
Most dropouts have a hole in them where the rear derailleur cable feeds through, causing it to become slightly enlarged with time – making it difficult to pull the line back through. To resolve this problem, remove the rear derailleur altogether to access the end of the cable and feed it through manually.
The other end of the cable (the one that feeds into your rear shift levers) has to be fed through as well. Still, because there isn’t any hole in dropouts for this end of the cable to go through, you’ll have to make your own by cutting off part of an old inner tube and using your pliers to crimp it around the wire (wherever you want). This is just temporary until you get better gear cables; just cut out another piece of the inner tube and do it again if needed after installing new gear cables or whatever else is causing the cable to be too tight.
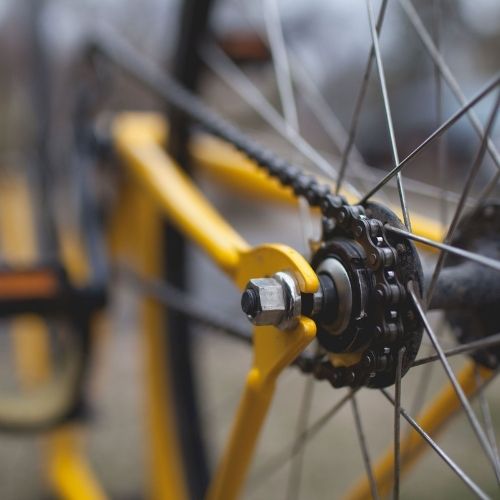
After making sure the entire bicycle is well supported by a bike work stand or other means, remove your front and rear gears from the bike to access all derailleur cables. Once removed, stretch out both derailleur cables, so they’re easier to work with when pulling them back through their respective holes at a later time.
The next step would be removing the old gear cables (and sometimes brake cables) from your bicycle. Since you should already have done that before even getting started here, I won’t get into it again except to say that removing an old gear cable is different than removing an old brake cable…so make sure you keep track of where everything goes.
Once new gear cables are installed, go ahead and reattach everything to the frame (brake cables included), feeding new gear cables through their respective holes in the dropouts.
New brake cables need to be appropriately routed before they’re tightened down again; use your multi-tool (or similar device) to twist them around spokes and other places where you can’t run into any interference with tight turns.
When installing new brake cables, make sure to keep them as taught as possible; if they droop or sag at all, it could cause interference problems when applying brakes (also, replace old brake pads if required).
If your wheel won’t stay perched on top of your work stand while performing any of these tune-up tasks, then use a quick-release skewer but make sure to close it back up once you’re done working on the bike.
When tightening down all hardware, be careful not to overtighten anything, or your frame may bow. If you start noticing that whenever you tighten down one bolt, another one of equal size starts loosening itself, then you know you’re overtightening and need to back off. It’s essential to use your common sense when doing tune-ups, so your bicycle is safe for riding on those long rides again…don’t just stare at these instructions and go about forcing bolts in place until they seize.
After everything has been tightened down properly, turn the bicycle upside-down, so the wheels are resting on the ground. Now grab your pliers and crimp cables together as tight as you can until there’s no wiggle room whatsoever; if the cables screech or make any other weird noises while this is happening, then you know they need to be replaced as well (that means it’s time for new gear cables).
New gear cables should be plenty taught without too much effort on your part – but don’t fret! We’ll get into how to set them up in a second.


